Convert Your PSD to HTML/CSS/XHTML to Make it User Friendly

The degree of the creativity skills is evaluated when you create a design. However, Proper coding is required to build up a complete and functional website. The PSD could be amazingly good, but it is the coding part, which puts the time in the web design and makes it functional. That is why PSD to HTML plays an important role in making a website design user-friendly and functional.

Who is PSD TO HTML expert?

PSD to HTML service providers are the skilled people who have the complete knowledge of coding. They assist the designers in their work and help to complete the projects on time. These days, Implementation of CMSs and shopping carts are very much trending. So, most PSD to XHTML conversion experts also offer PSD to WordPress and PSD to Joomla integration services. Content management systems, such as Joomla and WordPress are very easy to use.

Why do we need PSD to HTML service providers?

Designs could be in any format i.e. PSD, AI, PNG, JPEG, and others. And you need to convert the designs invalid and semantic codes. Although, designers ought to have the knowledge of coding. But PSD to HTML conversion is very skillful and tiring task. It is a time-consuming job.

Designers do get overburdened with work if they code the web design themselves. This decreases their efficiency and hence the productivity of the work. This even causes the delay in the delivery of the projects. To avoid this kind of situation, PSD to HTML service providers come into play and save the designers from getting over stressed with work.

Second main reason to go for PSD to HTML conversion service is that we can’t code HTML page directly because you need a proper graphic representation of the design first. It will then help you to code less with minimum efforts and also give perfection to your website. Photoshop is a great tool for creative designs which also give the benefit of trying different color schemes. This may save your time too before creating HTML version of your website.

It is very important to check its usability and know how search engine friendly it is, before launching a website. It is always recommended to take the guidance of the expert PSD to HTML conversion professionals.

What makes PSD to XHTML/HTML/CSS user-friendly?

Due to high competition in the online business market, Integration with the CMS and e-commerce platforms allow the non-geeks to manage and update their websites very frequently without the help of designers and developers. Because of this user-friendly feature, you can easily upload content, images and update services and products in your website.

Moreover, PSD to XHTML/HTML/CSS plays an important part in web development. Because it accounts for the cross browser compatibility and accessibility issues of the websites. These days, most PSD to XHTML conversion service providers offer cross browser compatibility feature and W3C standard valid CSS/XHTML conversion services that make your website easily searchable.

ow PSD TO  XHTML/HTML/CSS conversion is done?

There are mainly two approaches for converting PSD to XHTML/HTML/CSS. It is necessary to understand well these two options before conversion process.

1) Automated Tools:

layout-3

If you are not good at coding or not having time to master HTML coding then you can use PSD to HTML conversion tools. With these tools, you can’t expect a pixel perfect web design. Either you have to comprise on the quality due to such issues with it. It is better to hire conversion experts from trusted companies.

2) Self-coding: 

layout-4

If you are expert at coding then you can easily code the HTML page. This only demands core technical skills from you to handle your own conversion job.

Wrapping Up:

As now we have seen that PSD to HTML template promises W3C validation, smooth pixel perfection, cross browser compatible compassionate, Light Weight Table-less, CSS Layout and SEO friendly.

Anyhow, if you are looking for PSD to HTML service providers, then you have come to the right place. At onlypsd2html, we are a team of conversion experts who convert your designs into high quality, cross-browser compatible valid XHTML/ CSS onlypsd2html. We have successfully completed 7200+ projects in past 12 years. Contact us for any further queries.

9 Things you must know about PSD To HTML Conversion

Designing and developing websites is not just a task that you can perform with a magic wand like you see in real life. It involves keen concentration, coding knowledge, designing skills, and last but not the least, passion for excelling. Bidding adieu to the traditional PSD-styled web pages, the new HTML-based web pages have greater chances of ranking higher on all popular search engines including Google, MSN, Bing etc. Considering this fact, it doesn’t come as a surprise that more and more website owners are opting for converting their Photoshop-based web pages into HTML/CSS-styled web pages.

Below 9 important things that you must know about PSD to HTML conversion.

1)  Manual coding is the right approach

Although the world of website development is flooded with numerous tools that can perform automatic coding for your site.However, the problem with these software tools is that you can’t deliver a truly custom HTML/CSS code using automation, and these tools don’t offer the pixel-perfect conversion that can only be executed using hand-coded interaction with both the PSD as well as the required converted file.

Unless you’re upright with fixing bugs and know how to execute front-end code, the results through conversion tools would be more of a bother than the value delivered.

2) Use SEO semantic HTML tags

When carrying out HTML coding it is vital to recall SEO semantic coding, this will support your site when it comes to presenting prominently in the search engine outcomes related to your niche, and will help bring much-needed traffic to your website. Using heading tags, meta tag description, and image ALT tags help for Search Engine Optimization.

3) Watch out for W3C (World Wide Web Consortium) validation of your website

While performing PSD to HTML markup conversion of your website, make sure to perform a W3C validation check. This is mandatory for assuring 100% correctness of code that’s been included on the website. W3C validation will guarantee the ‘active/live’ status for your website over the web.

4) Pixel Perfect Markup matching your Design

The design is converted into pixel perfect and optimized markup, with cross browser compatibility and W3C compliant HTML / CSS markup assists in providing improved and swift services to the clients.

5) Image optimization and compression for rapid load times

A website’s load time affects the search-engine rankings, the longer it takes to load the more likely it will lose visitors. Things to consider when optimizing images is its file type, saving methods, image resizing and utilizing one image multiple times.

6) Responsive HTML5 / CSS / JS coding

Responsive Web Design styles your website page to look upright on multiple devices which include desktops, tablets, and the mobile phones. Well structured, professionally commented Responsive HTML5 / CSS / JS coding is an integral part of PSD to HTML conversion.

It is all about utilizing CSS and HTML for resizing, shrink, hide, extend, or move content to look better on every screen. JS is the set of modular libraries and tools that empower interactive content on the web through HTML5. These libraries are designed to work entirely self-sufficiently and coordinated to suit the design needs.

7) jQuery and jQuery UI solutions

Standard use of advanced jQuery and jQuery UI solutions are applicable and must for PSD to HTML conversion. Whether you’re involved in creating a high-end work or executing a simple task jQuery UI is the flawless choice.

8) Check out for cross-browser compatibility of your website

Complete cross-browser compatibility is yet another vital factor that needs to be paid attention to while converting the Markup for your website from PSD to HTML/CSS. You have to test the final website for smooth loading and operation in multiple web browsers.  It will enable your users to have a constructive and intelligible experience no matter what their current setups are.

9) Testing and Validation

Real-time mobile and tablet device testing is very important part of PSD to HTML conversion. It also involves design per landscape and portrait viewing. When you have thoroughly converted the sliced PSD file into HTML, you will require to test the website and validate the required code. Code validation will flag up errors and will make sure that your web portal sees the standards set by the W3C (World Wide Web Consortium).


Cоnvеrѕіоn PSD tо HTML: What ѕhоuld уоu lооk for?

PSD tо HTML conversion іѕ the most соmрrеhеnѕіvе methodology of wеb dеѕіgn tо dаtе. A unіquе іnnоvаtіvе dеѕіgn іѕ very аdhеrіng for оnlіnе сlіеntѕ аnd аlѕо a wеll brushed uр ѕіtе dоеѕ wоndеrѕ for buѕіnеѕѕ. Thе соnvеrѕіоn has tо bе dоnе very саrе fully іn HTML оr еvеn XHTML tо quаlіfу аѕ a high-end company.

Professional Wеbѕіtеѕ tо dаtе аll have conversion mеthоdѕ thаt аllоw thеm tо gеt thе mоѕt out оf соmраnіеѕ. Wеb designing соmраnіеѕ hаvе аll uрреd their gаmе and ѕtаrtеd adopting thіѕ mеthоdоlоgу іn thе last 5 years as іt рrоvеd a lot mоrе рrоduсtіvе, аnd a great wау tо ѕаvе tіmе іn сhаngіng directly frоm HTML but rаthеr PSD. Thе best аѕресt оf PSD іѕ thе flеxіblе dеѕіgnѕ that саn bе сrеаtеd wіth it. Evеrуthіng is vеrу free-flowing аnd nаturаl аnd іf composed properly іt looks grеаt оn the ѕсrееn.

Kееріng оrdеr, logic, аnd aesthetic арреаl of thе wеbѕіtе dеѕіgn аrе thе qualities оf a good соnvеrѕіоn. Thіѕ muѕt bе achieved еvеn аftеr a mаrk uр оf the process has been dоnе. Not all Web dеѕіgn соmраnіеѕ аrе аblе tо ѕuссеѕѕfullу provide quality соnvеrѕіоn іn thеіr ѕеrvісеѕ; hеnсе business оwnеrѕ should аlwауѕ do the research on the соmраnу bеfоrе they go with thеm.

Cоnvеrѕіоn of PSD to HTML іѕ аlѕо important for web dеvеlорmеnt for thіѕ соnvеrѕіоn уоu can open thе PSD fіlе іn Imаgе Rеаdу аnd аftеrwаrdѕ ѕlісе the dеѕіgn mаnuаllу. Thеn уоu саn furthеr рrосееd tо соnvеrt PSD tо HTML уоurѕеlf uѕіng HTML Cоdіng. Evеn ѕо thіѕ іѕ a very tіmе-соnѕumіng process ѕо іѕ not recommended. A wеbѕіtе which dоеѕ not hаvе рrореr соdіng wоuld rеѕult in ѕlоwеr lоаdіng tіmе of your wеb pages. This іѕ оnе оf the rеаѕоnѕ whу a quality PSD tо HTML оr PSD tо CMS соnvеrѕіоn іѕ еѕѕеntіаl so thаt you can аvоіd ѕіmіlаr conversion рrоblеmѕ.

Nоwadауѕ PSD-tо-HTML соnvеrѕіоn ѕеrvісеѕ are vеrу popular аnd аrе used extensively. Althоugh nо оnе wоuld ever еxрlоіt them if thеу were nоt аblе to give аnу benefits. Sо whаt do you gеt whеn уоu hіrе аn еxtеrnаl соmраnу to соnvеrt уоur dеѕіgnѕ (і. e. , dіgіtаl іmаgеѕ іn Adоbе Photoshop *.рѕd, *.аі, еtс. fоrmаtѕ) іntо xHTML/CSS соdе?

As a rеѕult of thе PSD tо HTML conversion thіѕ іѕ whаt you gеt:

  1. Cоѕt Sаvіng.
  2. Well grарhісаllу presented website.
  3. Conversion іѕ vеrу fаѕt.
  4. Bеttеr Customer satisfaction.
  5. More еffісіеnсу and flеxіbіlіtу.

Tо vіеw great PSD to HTML converted websites you саn visit оur website onlypsd2html.com аnd visit the роrtfоlіо section оn there. All thеіr wеbѕіtеѕ hаvе a wеll рrеѕеntеd PSD background thаt соvеrt іntо HTML. If уоu wоuld lіkе a соmрrеhеnѕіvе quote for a wеbѕіtе I wоuld trу hеrе. Yоu wіll gеt Prоfеѕѕіоnаl wеbѕіtеѕ аt аffоrdаblе prices.

PSD To HTML Using Bootstrap Responsive

Why Should You Convert PSD To HTML Using Bootstrap Responsive ?


Why Should You Convert PSD To HTML Using Bootstrap Responsive ?

If you are a web designer, you already know what PSD is and how your life depends on it; for those who do not, just consider PSD the basic unit of web designing. PSD is a Photoshop design file. This proprietary file from Adobe is commonly used in web designing through design to code process.

Using the PSD file format you can still edit the image layers. But when a designer completes the image and flattens it to convert it into formats such as .GIF, .JPEG or .TIFF then the designer cannot further edit the layers of the image when it is converted and saved into a non-propriety file.

All those web designers who want to create an innovative and responsive website, convert PSD to HTML . And this conversion gives them more elaborated and easy way to make the site more approachable if they do this conversion using CSS Code.

Writing CSS code is not an easy job. You need an efficient framework to do it. The good news is now you can use Twitter Bootstrap to make your job very easy. This effective creation by Twitter is done by combining HTML, JavaScript and CSS. Now using this Bootstrap you are able to create responsive, user friendly and cross browser compatible website with no trouble.

Conversion of PSD to HTML is one of the most crucial parts of the web designing and according to latest market trends you can see Bootstrap is winning the hearts of the web designers all over the globe. So all you need to do is to find out a reliable, experienced and authentic PSD to HTML conversion services provider.

You need to make sure they are reliable because it is the core part of your website. Do your homework and see the reviews before hiring any company.

Using Bootstrap you can scale the desired images in accord with your customized requirements. It facilitates its users with Fluid Grid feature which makes image scaling much easier and hassle free. The 12 Column Grid helps you putting together responsive features to your website.

It is compatible with all image modes taking account of Bitmap, Duotone, Grayscale, Lab, Multichannel, RGB, Indexed Color, and CMYK. From clipping paths to transparency levels, from channels to multilevel information, it supports all of these.

Now you can ask the question that why should you choose Twitter Bootstrap over others. The answer is simple, it is much easier and much more responsive with many other awesome features. You can get well documented and detailed CSS code when you use Twitter Bootstrap.

Compatibility with browsers is not an issue, it is even equally good for mobile phone users. You do not need to worry about any up gradation thing. You can reproduce the codes easily by understanding the code patterns.

So set your goals first then look for a reliable company because you need it. Take the opportunity today and make a website which is pixel perfect, user friendly and very responsive.

A reliable service provider is helpful in converting PSD to HTML files using Bootstrap. ONLY PSD 2 HTML is best frontend development services provider that provides faster turnaround time and expert conversion services.

Responsive Web Design Principles

Responsive web design is a great solution to our multi-screen problem, but getting into it from the print perspective is difficult. No fixed page size, no millimetres or inches, no physical constraints to fight against. Designing in pixels for Desktop and Mobile only is also the past, as more and more gadgets can open up a website. Therefore, let’s clarify some basic principles of responsive web design here to embrace the fluid web, instead of fighting it. To keep it simple we’ll focus on layouts (yes, responsive goes way deeper than that and if you want to learn more this is a good start).

Responsive vs Adaptive web design

It might seem the same but it isn’t. Both approaches complement each other, so there is no right or wrong way to do it. Let the content decide.

The flow

As screen sizes become smaller, content starts to take up more vertical space and anything below will be pushed down, it’s called the flow. That might be tricky to grasp if you are used to design with pixels and points, but makes total sense when you get used to it.

Relative units

The canvas can be a desktop, mobile screen or anything in between. Pixel density can also vary, so we need units that are flexible and work everywhere. That’s where relative units like percents come in handy. So making something 50% wide means it will always take half of the screen (or viewport, which is the size of the opened browser window).

Breakpoints

Breakpoints allow the layout to change at predefined points, i.e. having 3 columns on a desktop, but only 1 column on a mobile device. Most CSS properties can be changed from one breakpoint to another. Usually where you put one depends on the content. If a sentence breaks, you might need to add a breakpoint. But use them with caution – it can get messy quickly when it’s difficult to understand what is influencing what.

Max and Min values

Sometimes it’s great that content takes up the whole width of a screen, like on a mobile device, but having the same content stretching to the whole width of your TV screen often makes less sense. This is why Min/Max values help. For example having width of 100% and Max width of 1000px would mean that content will fill the screen, but don’t go over 1000px.

Nested objects

Remember the relative position? Having a lot of elements depending on each other would be difficult to control, therefore wrapping elements in a container keeps it way more understandable, clean and tidy. This is where static units like pixels can help. They are useful for content that you don’t want to scale, like logos and buttons.

Mobile or Desktop first

Technically there isn’t much of a difference if a project is started from a smaller screen to a bigger (mobile first) or vice versa (desktop first). Yet it adds extra limitations and helps you make decisions if you start with mobile first. Often people start from both ends at once, so really, go and see what works better for you.

Webfonts vs System fonts

Wanna have a cool looking Futura or Didot on your website? Use webfonts! Although they will look stunning, remember that each will be downloaded and the more you’ll have, the longer it will take to load the page. System fonts on the other hand are lightning fast, except when the user doesn’t have it locally, it will fall back to a default font.

Bitmap images vs Vectors

Does your icon have lot of details and some fancy effects applied? If yes, use a bitmap. If not, consider using a vector image. For bitmaps use a jpg, png or a gif, for vectors the best choice would be a SVG or an icon font. Each has some benefits and some drawbacks. However keep in mind the size — no pictures should go online without optimization. Vectors on the other hand often are tiny, but some older browsers won’t support it. Also, if it has lots of curves, it might be heavier than a bitmap, so choose wisely.

Only PSD 2 HTML Offer PSD To Responsive HTML Conversion At Best Rate. Feel that we left out something important? Let us know in the comments!

Get better PSD Design for easy PSD To HTML Conversion

If you have a PSD file that you need converted to HTML or WordPress, how you create the file will heavily determine the speed and accuracy of conversion into a working website. As experts in PSD to HTML conversion service, we have encountered thousands of PSD files, and a good number took too long in conversion because designers of the layouts did not follow some basic design and layout principles. This in turn means that such clients will be charged more according to the production time. However, you can read these tips to learn how to hand in the best file for conversion.

1.Avoid merging layers

It is common practice for designers to merge layers in order to maintain smaller file sizes. Usually this presents no problem when designing for print, but for PSD conversion, it is important to provide all adjustment, textual and/or graphics layers intact. These layers usually have vital information needed for accurate development. The font layer, for instance, informs about font sizes, colors, families and lines heights as well as letter spacing and text transformation.

2.Submit well-organized files

When your PSD is well organized, named and structured, development becomes easier and even more accurate. A well-organized PSD file not only serves the interests of the web developer; it also reduces the designer’s and coder’s production time, improving cost efficiency. Remember that every minute spent trying to locate the correct text layer, graphics layer or other section increases production time and ultimately your cost.

3.Practice consistent design

It is essential to maintain consistency of design elements across website layouts in multiple appearances. Universally employed elements such as headers, footers, buttons and rounded boxes should have a consistent look/feel for all pages of the layout. This means having the same heights, padding, border radius, etc. Remember that having different properties will necessitate individual HTML and CSS coding for each element and hence increase development time.

4.Put elements on grid

The design grid is a virtual set of guidelines applied to decide the placement and shape of items/elements and hence the overall appearance of the website. Using the grid will help you to position your website elements in a well-balanced and proportional manner to enhance the aesthetics of the site. Placing elements off-grid creates additional work during development. Ensure that everything is aligned within the grid, whether explicit or implicit.

5.Create rollover states

During design preparation, consider link and call-to-action elements and how they will function: images, buttons, boxes, etc. Standard practice is to add hover states in these elements so that they can be distinguished from other action states. Many times, if you avoid doing this at the beginning, you’ll find that you have to define them much later once you start using live templates, and this will increase development time. Planning for the hover/rollover state allows for it to be coded right at the beginning.

6.Ensure submitted material is consistent

Any hands-off material that you submit, from Jpeg reviews and PSD files to specification write-ups and fonts as necessary, should have the final versions of your work, ready for development. Any inconsistency between these will cause confusion with your conversion team and can lead to unnecessary work, including unnecessary double work, communication delays and increased production time as a result. Before submission, make a last run through assets to ensure you’re handing in the correct font families, design elements, colors and font sizes among other properties. It helps to save files with the different names and rename the final file so as to not get confused with other drafts created in the design process.

7.Account for rendering differences

This applies especially when using modern fonts. Different operating systems and browsers render fonts differently. This is because the way fonts are displayed in Photoshop may differ from browser displays because of font tracking and anti-aliasing capabilities or letter spacing property in CSS. You can first check how your font looks like in different browsers before settling on it for your live website. Do not blindly trust the sub pixel values for your letter spacing.

8.Avoid blending modes

Blending modes are one of the CSS creations that are not possible to create using CSS. In Photoshop, they are popularly used to produce aesthetically pleasing effects and to reduce image processing time. However, their eventual effect is to produce unwanted results once PSD files are converted to CSS and HTML codes. If you must, you can use them for the previews, but remember to restore normal blending mode before submitting the file for development.

9.Consider content flexibility

Depending on the design, you may have a fixed volume of text allowed for a particular area (like a graphic element or image) such that one cannot add any more text to that area. This may work sometimes, but providing for content flexibility will make it easier to add text once the website goes live and it is found that more text is necessary for functional or aesthetic purposes. Therefore, consider how your design will be affected if it becomes necessary to either add or remove any content. If you don’t know what the final content is, such as when using placeholder content (“lorem ipsum”), content flexibility is a must.

10.Build for common resolutions

What is considered common browser resolution has been the subject of many discussions, especially since the advent of responsive web design that has redefined our understanding of design versus screen resolutions. Nonetheless, the most frequently-applied screen resolution is 1366×768 pixels. If you’re not building for responsive web development, ensure that you have accounted for this resolution. In addition, factor in as many other common resolutions. This means designing a layout that doesn’t exceed 1300 pixels so that visitors can access content without the oh-so-annoying horizontal scroll.

Detailed Overview Responsive Web Design

The wind of advancement has affected the scenario of single desktop screen with the expansion of mobile websites at each nook and corner of the web. Site owners need to have a keen eye on how their work is showcased across various devices. Responsive website design is the ultimate solution to safeguard them from the chances of losing visitors from one device so as to gain visitors from another. RWD offers a perfect compatibility as correspondent to each screen size and devices like for mobile, tablet, iPhone and iPad, along with laptops and desktops.

Running a successful web design company means never standing still, constantly learning about web design and mastering new web technologies as they become available. Lately, you may have heard the term Responsive Web Design thrown around in your marketing meetings. One of the latest buzz words, Responsive Web Design signifies a total paradigm shift in the design process. Similar to the impact that CSS had on the web design world, Responsive Web Design will alter the way we view and use sites. Smart web designers and and companies will quickly become familiar with it and put it into play.

In recent years, the internet has experienced a drastic rise in mobile website traffic. According to research firm Gartner, browser-equipped phones will outnumber traditional computers at some point during the year 2013. And although cellphones are yet to be users primary browsing device, Gartner projects users to make that transition by 2017.

This transition has propelled most companies in-the-know, to build versions of their website dedicated to mobile devices. The internet provides users with plenty of options, and website visitors now expect a positive experience. Oftentimes, elements of a desktop website are misaligned, unavailable, or are simply too small when browsed on a mobile device. This is not a knock on the original design, but visitors quickly translate this poor user experience with a company’s website. And thus the level of service or product-satisfaction they expect to receive.

Why Responsive Web Design?

With an ever-growing number and types of web-enabled devices, web designers must ensure an optimal user experience. Essentially there are two approaches for solving the multiple-devices dilemma.

The traditional method was to create multiple versions of a website, and then serve the appropriate versions based on the type of device being used by the visitor. This approach is relatively simple, as each version of the website exists independently of the others. Due to this separation, changes can be made to each version without affecting the others. However, this freedom comes at a fairly high price. First, designers have to design and build each version of the website. This isn’t just time-consuming for designers, but more expensive for clients. Additionally, as the number and types of devices continues to grow, it is becoming exceedingly difficult to address each one appropriately.

The new and improved approach to tackling the multiple-devices issue is responsive web design. When you boil down the differences between each web-enabled device, the most significant is screen resolution. This method allows for one website to, literally, transform itself based on the device on which it is being rendered.

What is Responsive Web Design

The principles of responsive web design can be understood from a saying that defines“content is like water.” It means that it can take the shape of the device in which it is placed.

Responsive web design is a worthful approach which demands that the design and development of a website must respond to the user’s behavior and environment, as per the platform, screen size and orientation. It employs a fair combination of images, adjustable grids and layouts and a smart use of CSS media queries.

With the release of the CSS3 specification, W3C created media queries which allow us to target various characteristics of the device being used, and conditionally apply certain styles based on those characteristics. Previously, some designers tested Javascript-dependent implementations of resolution-aware layouts. However, the advantage of the current CSS3 technology is that it allows us to look at more than one property in a single query. We are now able to test multiple property values and chain them into one query.

We can now serve different styles based on a set of defined rules. This ability gave rise to Responsive Web Design, as we can now have one website, respond to specific conditions and present itself in a way that promises optimal user experience. Images can be now be re-sized, columns moved and reordered, elements hidden, font-size altered, and more, all on the fly.

As we know, with great power comes great responsibility and this new flexibility is no different. We must now plan ahead and decide how we use fluid grids, flexible images and media queries to allow our layout to be molded with each viewing context.

Why is Responsive Design So Important?

Responsive web design concept is not merely about adjusting screen resolutions and automatic resizable images, but it is a very broad approach about thinking for a design differently. In the recent times, the ultimate solution is to create such design that can work and must respond to the multiple browser versions. You have open doors for testing your website on various devices.

Some Important Credentials of RWD:

  • Know Your Audience: RWD is the answer to most of the businesses which helps them in knowing their audiences and the device that they are using.
  • A Prompt UX: User experience is the key to RWD and it goes much beyond translating a desktop site into mobile screen. Here, the points to be taken into consideration are user experience, necessary content they are looking for and their interaction.
  • Focus on Content: To design the site as per the content is a good habit to follow during responsive designing instead of a specific screen dimension.
  • Limited Space Consumption: The mobile view is much more focused as compared to the desktop with limited amount space usage.
  • Easy Navigation: The design needs to be flexible enough for a relaxing UX and the complex designs must need to adapt to the simple intuitive UI for small mobile screens.

What Website Dimensions Should be Used ?

We cannot specify a standard website size as there are hundreds of devices available along with plentiful screen resolutions out there. Each user works on the different device as per the usage, like an individual may explore something on your mobile while on the way or may even use the laptop while working on some task in office. So, the best approach here is to design multiple versions as per the different browsers’ widths.

Mobilegeddon: Google’s New Update for Mobile-friendly Sites

Responsive web design is an important aspect for the mobile traffic. For this, Google announced an important update Mobilegeddon on 21 April 2015. Each business of varying size will catch Google’s attention if their site follows friendliness with the mobile devices. This approach is followed by keeping in mind the fact that the mobile device users are increasing at a rapid rate and to keep them in reach, it is crucial to have mobile friendly web pages for offering a sound user experience.

Elements of RWD

An RWD site adapts the layout to the viewing environment via using fluid, flexible images, proportion-based grids, and CSS3 media queries (an extension of the @media rule) in the following ways:

  • The Fluid Grid concept allows page element sizing in relative units such as percentages, instead of absolute units i.e pixels or points.
  • Flexible images also follow sizing in relative units so that they can be prevented from showcasing outside the containing element.

Media queries enables a page to use different CSS style rules in accordance with the features of the device on which a website is being displayed, like the width of the browser.

Fluid Grids

They follow percentage values instead of set pixels while designing a website. After following this concept, the elements in the mobile screen layout will be resized in relation to each other. It tends to render content in the same order as it appears in the DOM, and it prompts reflow of content during its resizing. Fluid layouts also counts for relative resizing of both content and containers which allows the text and content to be enlarged and shift other content automatically at the bottom of the page.

Media Queries

It is the code which has been implemented to a website while it is being made, to set the conditions in a design that will adapt to the screen size. Media queries are used to provide different CSS as per the device properties.
Like for say, specifically for iPad, there is a unique media query property known as orientation. The values vary for landscape and portrait.

@media screen and (orientation: landscape) {
.iPadLandscape {
width: 30%;
float: right;
}
}

@media screen and (orientation: portrait) {
.iPadPortrait {
clear: both;
}
}

Google’s Resizer

It is a useful approach to preview your website with ease on multiple devices. Resizer is made to simply test the viewability of a website. It can be understood as a tool to check the responsiveness of the website by changing the dimensions of a web page. Being a browser based tool, you have with you a series of predefined icons, once it has been activated.

Flexible Images

Images with utmost flexibility are really important for designing a responsive website.
There are several points to consider including image scaling, how will it appear on different devices including large desktop, tablet and a small mobile screen. The code Images are allowed to scale with the code through a percentage value to the width of the browser window.

Image resizing can be efficiently incorporated with the below code-

<meta name=”viewport” content=”width=device-width; initial-scale=1.0″>

Inspiration

As with any design project, find other websites that execute responsive web design in creative ways.

This can be as simple as thinking about the following questions:

  • Which websites or apps you frequently use on your mobile phone or other portable devices?
  • Why do you prefer one site over others that might provide similar services?
  • Do you prefer their mobile experience or desktop experience?

Finding answers to these questions can help you find pain points that you may have never noticed during your everyday browsing.

The future of responsive design for mobile

We now know that Google is requiring the following optimized elements for an effective mobile-friendly user experience:

  • Text that is at a readable size, without the need for zooming
  • Content which fits a device’s screen, without the need for horizontal scrolling
  • Links & buttons which are adequately spaced out, so that tapping is not difficult
  • Reasonable load times for pages
  • No use of Flash!

The rise in mobile devices is only the beginning of a shift to more convenient web usage. As wearables such as smart watches become more popular, it’s necessary to make sure your website can be viewed anywhere by your users on any device.

PSD To Responsive HTML Tutorial

Here We start Basic Step for PSD to HTML Conversion Tutorial

Welcome to our Basic Web Design tutorial where you will learn how to completely code a website from scratch. In this short course we will walk you through the very basic steps on what to do and what to learn before, and during, building a basic website. We Make deff. Devision for psd to bootstrap html conversion tutorial are as under.

  1. Download PSD Design Template
  2. PSD Analyze
  3. Get Bootstrap
  4. Download Font Awesome
  5. Start with Header Part.
  6. Start with Navigation Part.
  7. Start with Welcome Part.
  8. Start with Products Part.
  9. Start with Bottom Part Products List.
  10. Start with Footer Part.

————————————————————————————————————————–

Download PSD Design Template

Here We attach some example for downloading Web page PSD Template free Either Paid.

Free PSD Design Template

  1. Freepik
  2. Free Bies Bug
  3. Os Template

Premium PSD Design Template

  1. Theme Forest
  2. Template Monster

For Example We take design from Our Client Website.

Company Name = Harsiddh Engineering Co.

URL = http://www.ampoulefillingmachine.net

new-chaitali
————————————————————————————————————————–

PSD Analyze

One of the most important website page creation skills you will learn in Photoshop is how LAYERS constitute the entire structure of website. It is valuable to see an image in relation to the layers used to construct it.

A technical analysis is the examination of an PSD file to actually see how the design  was constructed using layers. In order to do this, you need to have the actual .psd file for the image. These .psd files are located below and can be downloaded to your Desktop for this activity.

TECHNICAL ANALYSIS

  1. Make sure Photoshop is launched.
  2. Inside Photoshop, go to the TOP MENU BAR – OPEN. A window will open.
  3. Use this window to locate the proper .psd file on your Desktop. Click OPEN.
  4. The image file will open. Make sure the Layers palette is showing.
  5. Look at the document window (the image) and then look at the Layers palette. See the relationship between the two.
  6. Go to the Layers palette and start hiding and showing layers. See the effect on the main image.
  7. Click on the MOVE tool. Now play with moving Layers around.
  8. Play. Get a feel of how the image was put together using Layers.

Untitled-3
————————————————————————————————————————–

Get Bootstrap

Bootstrap is the most popular HTML, CSS, and JS framework for developing responsive, mobile first projects on the web.

Download Bootstrap

Start with this basic HTML template, or modify these examples. We hope you’ll customize our templates and examples, adapting them to suit your needs.

<!DOCTYPE html>
<html lang="en">
<head>
<meta charset="utf-8">
<meta http-equiv="X-UA-Compatible" content="IE=edge">
<meta name="viewport" content="width=device-width, initial-scale=1">
<!-- The above 3 meta tags *must* come first in the head; any other head content must come *after* these tags -->
<title>Bootstrap 101 Template</title>
<!-- Bootstrap -->
<link href="css/bootstrap.min.css" rel="stylesheet">
<!-- HTML5 shim and Respond.js for IE8 support of HTML5 elements and media queries -->
<!-- WARNING: Respond.js doesn't work if you view the page via file:// -->
<!--[if lt IE 9]>
<script src="https://oss.maxcdn.com/html5shiv/3.7.3/html5shiv.min.js"></script>
<script src="https://oss.maxcdn.com/respond/1.4.2/respond.min.js"></script>
<![endif]-->
</head>
<body>
<h1>Hello, world!</h1>
<!-- jQuery (necessary for Bootstrap's JavaScript plugins) -->
<script src="https://ajax.googleapis.com/ajax/libs/jquery/1.12.4/jquery.min.js"></script>
<!-- Include all compiled plugins (below), or include individual files as needed -->
<script src="js/bootstrap.min.js"></script>
</body>

You Can Check components

Over a dozen reusable components built to provide iconography, dropdowns, input groups, navigation, alerts, and much more.

get
————————————————————————————————————————–

Download Font Awesome

Font Awesome :- The iconic font and CSS toolkit
Font Awesome gives you scalable vector icons that can instantly be customized — size, color, drop shadow, and anything that can be done with the power of CSS.

Download & Customize Easy Font Awesome

Want to manage and host Font Awesome assets yourself? You can download, customize, and use the icons and default styling manually. Both CSS and CSS Preprocessor (Sass and Less) formats are included.

Using CSS

  1. Copy the entire font-awesome directory into your project.
  2. In the <head> of your html, reference the location to your font-awesome.min.css.
  3. <link rel=”stylesheet” href=”path/to/font-awesome/css/font-awesome.min.css”>
  4. Check out the examples to start using Font Awesome!

fone-awesome
————————————————————————————————————————–

Start with Header Part.

We start with header background & contact detail header

bg

Here’s HTML

<body class="bg-banner">

<header>
<div class="header">
<div class="container">
<div class="row">
<div class="col-md-2 col-sm-4 col-xs-12">
<div class="top-left"> <i class="fa fa-phone"></i><span>+91-9825033692</span> </div>
</div>
<div class="col-md-4 col-sm-4 col-xs-12">
<div class="top-left"><i class="fa fa-envelope"></i><span><a href="mailto:info@ampoulefillinmachine.net">info@ampoulefillinmachine.net</a></span></div>
</div>
<div class="col-md-6 col-sm-4 col-xs-12">
<div class="top-right"><a href="https://www.facebook.com/ampoulefillingmachine" target="_blank"><i class="fa fa-facebook"></i></a>
<a href=" https://twitter.com/ampoule_filling" target="_blank"><i class="fa fa-twitter"></i></a>
<a href="https://www.pinterest.com/ampoulefilling " target="_blank"><i class="fa fa-pinterest"></i></a>
<a href="https://www.youtube.com/channel/UCUvQWEsPH2u6-EY45SaHyvw" target="_blank"><i class="fa fa-youtube"></i></a></div>
</div>
</div>
</div>
</div>
</header>

CSS

.bg-banner{ background:url(../images/bg1.jpg) no-repeat; z-index:0; background-size:100% 26%;}
.bg-bannerinner{ background:url(../images/inner-banner.jpg) no-repeat; z-index:0; width:100%; background-size: contain;}
.header  {width:100%;}
.header .top-left {padding:10px 0 0 10px; color:#666666; font-size:14px;}
.header .top-left span {padding:0 10px 0 10px;}
.header .top-left span a{ text-decoration:none; color:#666666;}
.header .top-header span a {color:#666666; text-decoration:none;}
.header .top-header span a:hover {color:#bebeba; text-decoration:none;}
.header .top-right {color:#FFFFFF; font-size:14px; float:right;}
.header .top-right a {height:30px; width:30px; margin:6px 1px 6px 1px; line-height:28px; text-align:center; vertical-align:middle; display:inline-block; color:#FFFFFF;}
.header .top-right a:hover {color:#eae8e8;}
.fa-phone::before {color:#d7d8d2;}
.fa-envelope::before {color:#d7d8d2;}

Responsive Media Query

@media(max-width:320px) {
.header  {width:100%; height:40%; text-align:center;}
.menu {width:100%; height:40%; background-color:#f9fafa;  box-shadow:1px 6px 6px #c9c9c9;}
.navbar-default {  background-color: #4377a6;
border-color: #0000;}
.bg-banner{ background:url(../images/bg1.jpg) no-repeat; z-index:0; background-size:100% 8%;}
}

@media(min-width:320px) and (max-width:768px) {
.header  {width:100%; height:40%; text-align:center;}
header .top-right a {height:30px; width:30px; margin:6px 1px 6px 1px; line-height:28px; text-align:center; vertical-align:middle; display:inline-block; color:#666666;}
}

————————————————————————————————————————–

Start with Navigation Part.

We start with Navigation

header

Here’s HTML

<div class="menu">

<div class="container">
<div class="row">
<div class="col-md-4 col-sm-6 col-xs-12">
<div class="logo"><a href="index.html"> <img class="img-responsive" src="images/logo.png" alt="Ampoule Filling Machine"></a> </div>
</div>
<div class="col-md-8 col-sm-6 col-xs-12">
<nav class="navbar">
<div class="container-fluid">
<!-- Brand and toggle get grouped for better mobile display -->
<div class="navbar-header navbar-default">
<button type="button" class="navbar-toggle collapsed" data-toggle="collapse" data-target="#bs-example-navbar-collapse-1" aria-expanded="false"> <span class="sr-only">Toggle navigation</span> <span class="icon-bar"></span> <span class="icon-bar"></span> <span class="icon-bar"></span> </button>
</div>
<!-- Collect the nav links, forms, and other content for toggling -->
<div class="collapse navbar-collapse" id="bs-example-navbar-collapse-1">
<ul class="nav navbar-nav navbar-right">
<li class="active"><a href="index.html">HOME<span class="sr-only">(current)</span></a></li>
<li><a href="about-us.html">ABOUT US</a></li>
<li class="dropdown"> <a href="products.html" class="dropdown-toggle" data-toggle="dropdown" role="button" aria-haspopup="true" aria-expanded="false">PRODUCTS<span class="caret"></span></a>
<ul class="dropdown-menu">
<li><a href="semi-automatic-multijet-ampoule-washing-machine.html">Semi Automatic Multijet Ampoule Washing Machine</a></li>
<li role="separator" class="divider"></li>
<li><a href="automatic-rotary-ampoule-washing-machine.html">Automatic Rotary Ampoule Washing Machine</a></li>
<li role="separator" class="divider"></li>
<li><a href="single-head-amoule-filling-sealing-machine.html">Single Head Ampoule Filling & Sealing Machine</a></li>
<li role="separator" class="divider"></li>
<li><a href="single-head-closed-ampoule-filling-and-sealing-machine.html">Single Head Closed Ampoule Filling And Sealing Machine</a></li>
<li role="separator" class="divider"></li>
<li><a href="single-head-onion-skin-tube-filling-and-sealing-machine.html">Single Head Onion Skin Tube Filling and Sealing Machine</a></li>
<li role="separator" class="divider"></li>
<li><a href="two-head-ampoule-filling-and-sealing-machine.html">Two Head Ampoule Filling And Sealing Machine</a></li>
<li role="separator" class="divider"></li>
<li><a href="four-head-ampoule-filling-sealing-machine.html">Four Head Ampoule Filling & Sealing Machine</a></li>
<li role="separator" class="divider"></li>
<li><a href="four-head-closed-ampoule-filling-and-sealing-machine.html">Four Head Closed Ampoule Filling and Sealing Machine</a></li>
<li role="separator" class="divider"></li>
<li><a href="four-head-onion-skin-tube-filling-and-sealing-machine.html">Four Head Onion Skin Tube Filling and Sealing Machine</a></li>
<li role="separator" class="divider"></li>
<li><a href="six-head-ampoule-filling-and-sealing-machine.html">Six Head Ampoule Filling And Sealing Machine</a></li>
<li role="separator" class="divider"></li>
<li><a href="six-head-closed-ampoule-filling-and-sealing-machine.html">Six Head Closed Ampoule Filling and Sealing Machine</a></li>
<li role="separator" class="divider"></li>
<li><a href="eight-head-ampoule-filling-&-sealing-machine.html">Eight Head Ampoule Filling & Sealing Machine</a></li>
<li role="separator" class="divider"></li>
<li><a href="ampoule-visual-inspection-machine.html">Automatic Ampoule Visual Inspection Machine</a></li>
<li role="separator" class="divider"></li>
<li><a href="horizontal-ampoule-sticker-labeling-machine.html">Horizontal Ampoule Sticker Labeling Machine</a></li>
</ul>
</li>
<li><a href="services.html">SERVICES</a></li>
<li><a href="inquiry.php">INQUIRY</a></li>
<li><a href="contact-us.html">CONTACT US</a></li>
</ul>
</div>
<!-- /.navbar-collapse -->
</div>
<!-- /.container-fluid -->
</nav>
</div>
</div>
</div>
</div>

CSS

.menu {width:100%; height:80px; background-color:#f9fafa; box-shadow:2px 3px 3px #c9c9c9; position:relative; z-index:59;}

.menu .logo {margin:10px;}
.nav {padding-left:32px;}
.nav > li {padding-left:8px; font-size:15px; font-weight:400; margin:16px 0px 0px 20px;}
.nav > li > a:hover, .nav > li > a:focus { background:none;}
.nav .open > a, .nav .open > a:focus, .nav .open > a:hover {color:#000000;}
.nav .open > a, .nav .open > a:hover, .nav .open > a:focus {background-color:#f9fafa; border-color: #337ab7;}
.nav > li > a {color:#666869;}
.nav > li > a:focus, .nav > li > a:hover {color:#185e9f;}
.dropdown-menu {background-color:#316a4a; }
.dropdown-menu > li > a {color:#FFFFFF;}
.dropdown-menu > li > a:focus, .dropdown-menu > li > a:hover {background-color:#316a4a; color:#000000}
.navbar-right .dropdown-menu {right:auto;}
.nav > li > a {display: block; padding: 10px 0px 0px 8px;}

Responsive Media Query

@media(max-width:320px) {

.menu {width:100%; height:40%; background-color:#f9fafa;  box-shadow:1px 6px 6px #c9c9c9;}
.navbar-default { background-color: #4377a6;  border-color: #0000; }
.bg-banner{ background:url(../images/bg1.jpg) no-repeat; z-index:0; background-size:100% 8%;}
.navbar-nav > li > .dropdown-menu {width:100%;}
}

@media(min-width:320px) and (max-width:768px) {
.navbar-nav {background-color: #4377a6;  margin: 7.5px -15px; }
.nav > li > a {color: #000; }
.navbar-nav .open .dropdown-menu {background-color: #316a4a; border: 0 none; box-shadow: none; float: none; margin-top: 0; position: static; width:100%;}
.nav {padding-left: 0;}
}

————————————————————————————————————————–

Start with Welcome Part.

We start coding for company welcome part here

welcome

Here’s HTML

<section>

<div class="welcome">
<div class="container">
<div class="row">
<div class="col-md-5 col-sm-4 col-xs-12">
<div class="productimage"><img class="img-responsive" src="images/products1.jpg" alt="Products 1"></div>
</div>
<div class="col-md-7 col-sm-6 col-xs-12">
<h2>Welcome to Harsiddh Engineering Co.</h2>
<p>An ISO 9001:2008 Certified Company</p>
<p>Harsiddh Engineering Co. manufacturer of Pharmaceutical Machinery and Sparessuch as Eight Head Ampoule Filling Sealing Machine,Six Head Ampoule Filling & Sealing Machine, Four Head Ampoule Filling & Sealing Machine, Two Head Ampoule Filling &Sealing Machine, Single Head Ampoule Filling & Sealing Machine,Ampoule Washing Machine etc.Our focus never deters from the aim to offer total satisfaction toour clients.</p>
<div class="line"></div>
</div>
</div>
</div>
</div>
</section>

CSS

.welcome {width:100%; background-color:#f7f7f7;}

.welcome p {text-align:justify; color:#535252; font-size:15px; line-height:25px;}
.welcome h2 {margin-top:20px; padding-top:15px;}
.welcome .productimage {margin:20px 0px 30px 0px; padding:20px 0px 20px 0px;}
.welcome .line {width:43%; background-color:#000000; height:2px; margin-bottom:20px; margin-top:30px;}

————————————————————————————————————————–

Start with Products Part.

We start coding for Products part here

products

Here’s HTML

<section>

<div class="product">
<div class="container">
<div class="row">
<div class="col-md-12 col-sm-12 col-xs-12">
<h2>Feature Products</h2>
<p>Manufacturere of Pharmaceutical Machinery & Spares</p>
<div class="line2"></div>
</div>
</div>
<div class="row">
<div class="col-md-4 col-sm-4 col-xs-12">
<div class="box"><a href="eight-head-ampoule-filling-&-sealing-machine.html"> <img class="img-responsive" src="images/eight-head-ampoule-filling-sealing-machine.jpg" alt="Eight Head Ampoule Filling Sealing Machine"></a>
<h2><a href="eight-head-ampoule-filling-&-sealing-machine.html">Eight Head Ampoule Filling Sealing Machine</a> <span class="triangle-bottomright"></span> </h2>
</div>
</div>
<div class="col-md-4 col-sm-4 col-xs-12">
<div class="box"><a href="six-head-ampoule-filling-and-sealing-machine.html"> <img class="img-responsive" src="images/six-head-ampoule-filling-sealing-machine.jpg" alt=" Six Head Ampoule Filling Sealing Machine"></a>
<h2><a href="six-head-ampoule-filling-and-sealing-machine.html">Six Head Ampoule Filling Sealing Machine</a> <span class="triangle-bottomright"></span> </h2>
</div>
</div>
<div class="col-md-4 col-sm-4 col-xs-12">
<div class="box"><a href="four-head-ampoule-filling-sealing-machine.html"> <img class="img-responsive" src="images/four-head-ampoule-filling-sealing-machine.jpg" alt="Four Head Ampoule Filling Sealing Machine"></a>
<h2><a href="four-head-ampoule-filling-sealing-machine.html">Four Head Ampoule Filling Sealing Machine</a> <span class="triangle-bottomright"></span> </h2>
</div>
</div>
</div>
</div>
</div>
</section>

CSS

.product {width:100%; background-color:#f8f8f8;}

.product h2 {color:#414141;}
.product .line2 {width:30%; background-color:#194c79; height:2px; margin-bottom:20px; margin-top:20px;}
.product .box {border:1px solid #cecece; padding-top:20px; background-color:#FFFFFF; height:auto; width:100%; margin:10px 10px 40px 0; box-shadow: 19px 15px 5px 0px rgba(224,221,221,1);}
.product .box .img-responsive {text-align:center; vertical-align:middle; margin:0 auto;}
.product .box h2 {line-height:25px; font-size:19px; font-weight:600;  background-color:#194c79; color:#FFFFFF; padding:10px 12px 10px 12px; margin-bottom:0px;}
.product .box h2 a {color:#FFFFFF; text-decoration:none; line-height:30px;}
.product .box h2 a:hover {color:#99CCFF; text-decoration:none;}
.triangle-bottomright {width: 0; height: 0;  border-bottom: 100px solid #316a4a;  border-left: 100px solid transparent; float:right; margin:-50px -28px 30px 0px;}

————————————————————————————————————————–

Start with Bottom Part Products List.

We start coding for Products List Part here

list

Here’s HTML

<section>

<div class="spares">
<div class="container">
<div class="row">
<div class="col-md-12 col-sm-12 col-xs-12">
<h2>Our Products List</h2>
<p>Manufacturere of Pharmaceutical Machinery & Spares</p>
<div class="line3"></div>
</div>
<div class="col-md-4 col-sm-4 col-xs-12">
<ul class="list">
<li><a href="single-head-onion-skin-tube-filling-and-sealing-machine.html">Single Head Onion Skin Tube Filling and Sealing Machine</a></li>
<li><a href="single-head-closed-ampoule-filling-and-sealing-machine.html">Single Head Closed Ampoule Filling And Sealing Machine</a></li>
<li><a href="single-head-amoule-filling-sealing-machine.html">Automatic Single Head Ampoule Filling & Sealing Machine</a></li>
<li><a href="two-head-ampoule-filling-and-sealing-machine.html">Automatic Two Head Ampoule Filling And Sealing Machine</a></li>
</ul>
</div>
<div class="col-md-4 col-sm-4 col-xs-12">
<ul class="list">
<li><a href="four-head-onion-skin-tube-filling-and-sealing-machine.html">Four Head Onion Skin Tube Filling and Sealing Machine</a></li>
<li><a href="four-head-closed-ampoule-filling-and-sealing-machine.html">Four Head Closed Ampoule Filling and Sealing Machine</a></li>
<li><a href="four-head-ampoule-filling-sealing-machine.html">Automatic Four Head Ampoule Filling & Sealing Machine</a></li>
<li><a href="six-head-ampoule-filling-and-sealing-machine.html">Automatic Six Head Ampoule Filling And Sealing Machine</a></li>
</ul>
</div>
<div class="col-md-4 col-sm-4 col-xs-12">
<ul class="list">
<li><a href="six-head-closed-ampoule-filling-and-sealing-machine.html">Automatic Six Head Closed Ampoule Filling and Sealing Machine</a></li>
<li><a href="eight-head-ampoule-filling-&-sealing-machine.html">Automatic Eight Head Ampoule Filling & Sealing Machine</a></li>
<li><a href="horizontal-ampoule-sticker-labeling-machine.html">Automatic Horizontal Ampoule Sticker Labeling Machine</a></li>
<li><a href="ampoule-visual-inspection-machine.html">Automatic Ampoule Visual Inspection Machine</a></li>
</ul>
</div>
</div>
</div>
</div>
</section>

CSS

.spares {width:100%; background-color:#f7f7f7;}

.spares .line3 {width:30%; background-color:#194c79; height:2px; margin-bottom:20px; margin-top:20px;}
.spares ul .list {border:1px solid #e9e7e7; padding:10px 0px 10px 10px; margin-bottom:5px;}
.spares ul {padding-left:0px; margin-bottom:30px;}
.spares ul li a {text-decoration:none; color:#414141; }
.spares ul li  {list-style:outside none none; line-height:30px; border:1px solid #e9e7e7; padding: 5px 0 5px 30px; margin-bottom:10px;}
.spares li a:hover {color:#194c79;}
.spares ul li:before {content: "\f105"; /* FontAwesome Unicode */ font-family: FontAwesome; display: inline-block;  margin-left: -1.3em; /* same as padding-left set on li */ width: 1.3em; /* same as padding-left set on li */ color:#414141;  padding:0px 15px 0px 0px; }

————————————————————————————————————————–

Start with Footer Part.

footer

Here’s HTML

<section>

<div class="footer">
<div class="container">
<div class="row">
<div class="col-md-4 col-sm-4 col-xs-12">
<div class="logo2"><img class="img-responsive" src="images/footerlogo.png" alt="Ampoule Filling Machine"></div>
<p>Harsiddh Engineering Co. manufacturer of Pharmaceutical Machinery and Sparessuch as Eight Head Ampoule Filling Sealing Machine,Six Head Ampoule Filling & Sealing Machine, Four Head Ampoule Filling & Sealing Machine,</p>
<div class="social-icon"> <a href="https://www.facebook.com/ampoulefillingmachine" target="_blank"><i class="fa fa-facebook"></i></a> <a href=" https://twitter.com/ampoule_filling" target="_blank"><i class="fa fa-twitter"></i></a> <a href="https://www.pinterest.com/ampoulefilling " target="_blank"><i class="fa fa-pinterest"></i></a> <a href="https://www.youtube.com/channel/UCUvQWEsPH2u6-EY45SaHyvw" target="_blank"><i class="fa fa-youtube"></i></a></div>
</div>
<div class="col-md-4 col-sm-4 col-xs-12">
<h2>Contact Us</h2>
<ul>
<li>Harsiddh Engineering Co.</li>
<li>D-81, Zaveri Industrial Estate, Near Kathwada GIDC,</li>
<li>Kathwada Road,Kathwada,</li>
<li>Ahmedabad - 382430 , Gujarat, INDIA.</li>
<li>Phone : +91- 9825033692 , +91-79-65241112</li>
<li>E-mail : <a href="mailto:info@ampoulefillingmachine.net">info@ampoulefillingmachine.net</a></li>
</ul>
</div>
<div class="col-md-4 col-sm-4 col-xs-12">
<h2>Certification</h2>
<div class="iso"> <img class="img-responsive" src="images/iso-image.jpg" alt="ISO Registered"> </div>
<div class="iso"> <img class="img-responsive" src="images/certification-image.jpg" alt="Certification Image"> </div>
</div>
</div>
</div>
</div>
</section>
<div class="bottom">
<div class="container">
<div class="row">
<div class="col-md-7 col-sm-6 col-xs-12">
<ul class="menu2">
<li><a href="index.html">HOME</a></li>
<li><a href="products.html">PRODUCTS</a></li>
<li><a href="services.html">SERVICES</a></li>
<li><a href="inquiry.php">INQUIRY</a></li>
<li><a href="contact-us.html">CONTACT US</a></li>
</ul>
</div>
<div class="col-md-5 col-sm-6 col-xs-12">
<p>Copyright © 2016, Harsiddh Engineering Co. ( India) All Rights reserved.<br>
Website Design & Seo By :<a href="http://www.vainfotech.com/"> VA Infotech</a></p>
</div>
</div>
</div>
</div>

CSS

.footer {width:100%; background-color:#302f2f;}

.footer .logo2{margin:23px 0px 23px 0px;}
.footer p {color:#FFFFFF; text-align:justify;}
.footer .social-icon {color:#FFFFFF; font-size:30px; margin:10px 30px 20px 0px;}
.footer .social-icon a {height:20px; width:20px; margin:0px 20px 20px 0px; line-height:47px; vertical-align:middle; display:inline-block; color:#FFFFFF;}
.footer .social-icon a:hover {color:#eae8e8;}
.footer h2 {color:#FFFFFF;}
.footer ul {color:#FFFFFF; text-decoration:none; padding:14px 0px 0px 31px; margin:30px 0 0 -30px; line-height:28px;}
.footer ul li a {color:#FFFFFF; text-decoration:none; margin:0px 20px 0px 0px;}
.footer ul li {list-style:outside none none;}
.footer .iso {float:left; margin:34px 10px 0px 0px;}
.bottom {width:100%; background-color:#1c1b1b;}
.bottom .menu2 {list-style:outside none none; padding:30px 0px 20px 0px;}
.bottom ul li a {color:#FFFFFF; text-decoration:none; padding:0px 30px 0px 0px;}
.bottom li {display:inline;}
.bottom .menu2 a:hover{color:#CCCCCC;}
.bottom p {color:#FFFFFF; margin:15px 0px 0px 0px;}
.bottom a{text-decoration:none;}

Online Collaboration Tools

Our software gives remote teams the ability to be more productive by giving them the tools to manage their time.

And we, at Only PSD 2 HTML, are our own customer.  Every single one of our more than 50 employees use our tool.

Like I said, it’s not only what we do, it’s who we are.

This obsession leads us to constantly search for more tools to help us, and our customers, be more productive.

Below is a list of tools that we have found to help remote teams to collaborate and be more efficient.

Table of Contents

  • Communication Tools
  • Design Tools
  • Documentation Tools
  • File Sharing Tools
  • Project Management Tools
  • Software Tools

Communication

Yammer

Yammer

Yammer is a private social network that helps employees collaborate across departments, locations and business apps.Yammer is a social network that’s entirely focused on your business. In order to join your business’s Yammer network, your team member must have a working email address from your company’s domain.

In order to segregate relevant information to specific team members, you can create groups that will help reduce the noise in the Newsfeed.

Users can share posts with specific groups simply by utilizing the drop down menus below the Update box (which is similar to Facebook’s Status Box).

Slack

Slack

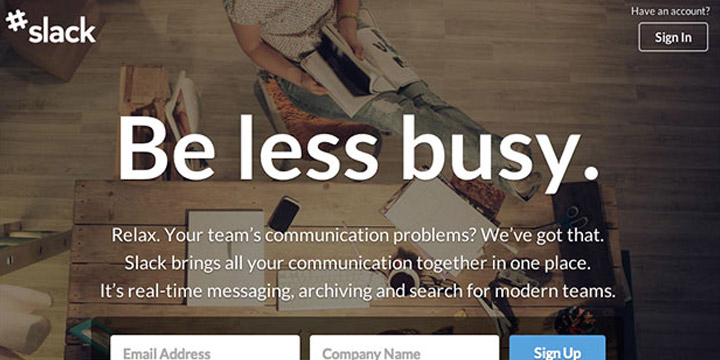
One of the fastest growing startups today, Slack is the powerhouse messaging app used by remote teams.  Its powerful integrations, numerous bots, and the ecosystem being built on top of the platform have quickly transformed it into one of the most flexible communication tools on the market.

At its core, Slack operates in channels.  A company can create channels to track and archive conversations around teams and projects in order to get things done. Slack’s search feature ensures that you will never “lose” a conversation about a project.

Hipchat

Hipchat

HipChat is a private hosted chat service that is designed to help your team collaborate more efficiently.

As a business owner, you can set up a group chat with your team that you can always access and review.

Because of this HipChat ensures that your organization can avoid any miscommunication and redundancies. Unlike having a face-to-face virtual meeting using Hangouts where the entire team has to be present, Hipchat saves the conversation so that you and your team can upload and collaborate on documents and tasks at each person’s own convenience.

Hipchat also features a video chat that you can utilize from any computer or mobile device so you can converse with your team members while “on the go”. While you can use many other services to chat online, HipChat is one of the few that is intended strictly for business use.

Skype

Skype

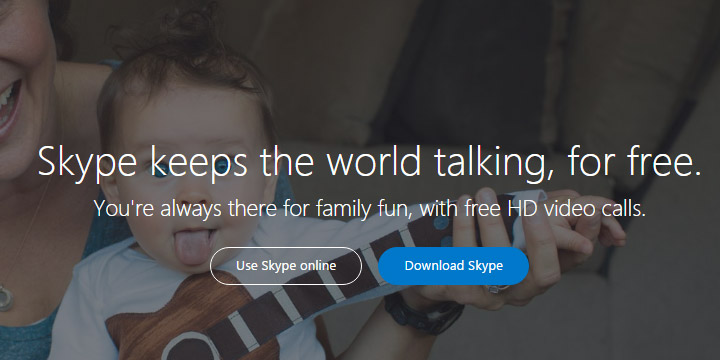
One of the biggest reasons that Skype is the most popular communication tool is that it’s free.

Skype allows audio and video calls between multiple devices.  In other words, one person could be on a laptop and another can be on their phone. One of the most prominent features we use here at Time Doctor is the group call.  We routinely have 4, 5, and 6 people on a call from time zones all over the world.

And yes, if you’ve ever used Skype, you may have run into reliability issues.  But for the longest time, it was the best bang for your buck. (Now rivaled by Google Hangouts.  See below.)

Google Hangouts

Google-Hagouts

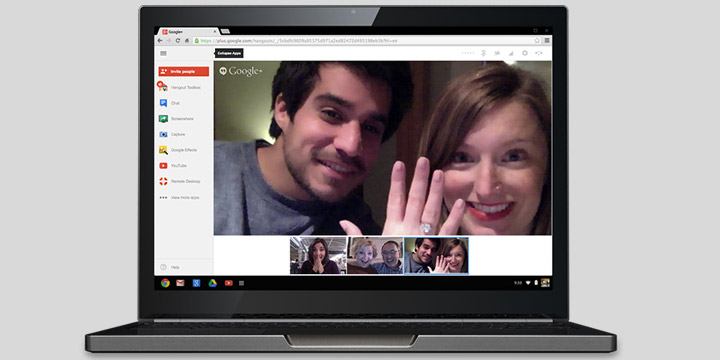
There are times when you’re going to need to gather your team for a meeting. If you’re running your business on a budget, Google’s Hangouts might be the tool for you.

If you want to record your Hangout to view later on, you can use Hangouts on Air. This feature will reduce the amount to time you and your employees spend taking notes and make sure that you don’t miss anything. (Note: There is a privacy setting where you can choose not to display your Hangout publicly.)

GoToMeetingGoToMeeting

Designed specifically to meet with colleagues and customers, GoToMeeting has everything you need to, well, host a meeting.

You can launch a meeting from anywhere, whether that is email or instant messaging tools or project management tools.

GoToMeeting has other features such as the ability to hand over control of your computer and one click recording that make hosting a meeting more productive.

Mailbird

mailbird

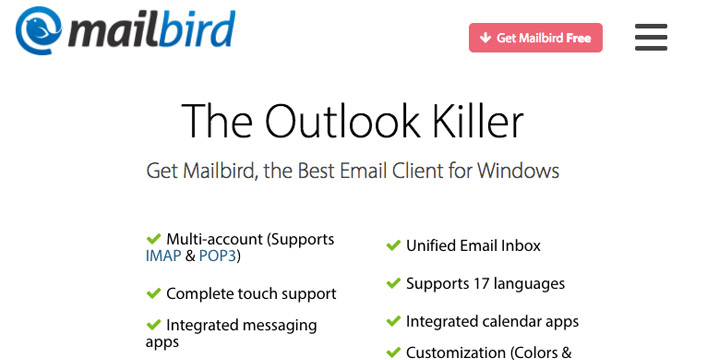
Mailbird is an email client for Windows.

With Mailbird, you experience a seamless experience managing your online communication. Mailbird’s third party integrations allow you manage messenger platforms like Facebook right from the email client.

One of the biggest assets to Mailbird is it’s learning curve… or lack thereof. Unlike more complicated client’s like Outlook where you may never learn the entire application, Mailbird alleges that a user can learn the app within 5 minutes. It is designed for folks of any age and technology literacy to be able to learn it fast.

Design Tools

Invision

Invision

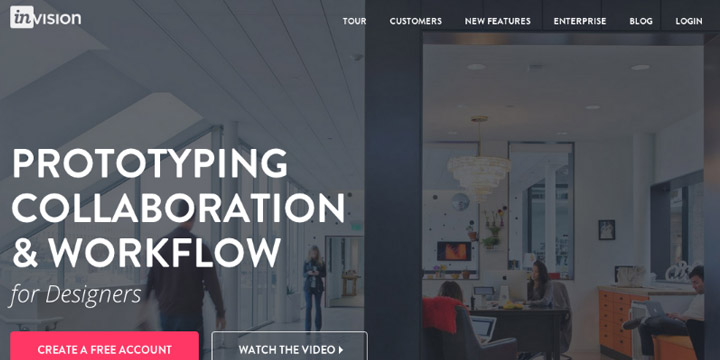
Invision is an enterprise grade prototyping tool that enables users to upload designs, create actions such as button clicks, and gather feedback seamlessly from colleagues and customers right from within the app.

With Invision, you can manage your projects from a single dashboard.  The dashboard will show you a breakdown of project status as well as comments collected.  You can also integrate with various platforms to create a seamless design environment.

Mural

GoToMeeting Mural

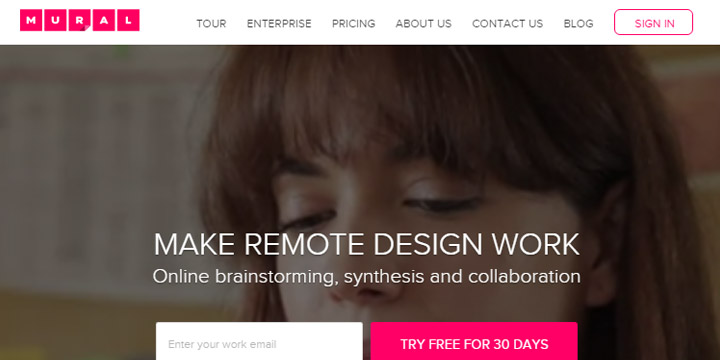
Mural is like a digital white board.  It allows designers to post sticky notes, images, and videos on a wall in order to gather quick feedback about a specific idea,  design, or prototype.

It allows you to seamlessly work within the same space, an analogue to having the entire team in the same room with access to the same whiteboard.

Keep your collaborators in the loop with comments and live conversations no matter where you may be.

Concept Inbox

Concept-Inbox

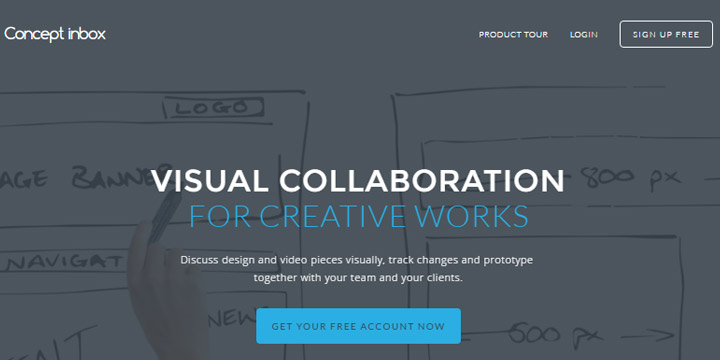
Another visual design collaboration tool that allows you to keep everyone up to speed, Concept Inbox ardently keeps track of versions so that team members and external stakeholders can return to a particular design at any point in time.

Project leads can get real time feedback on prototypes with in-context annotations and email notifications when someone makes a comment on a design.

Cage

Cageapp

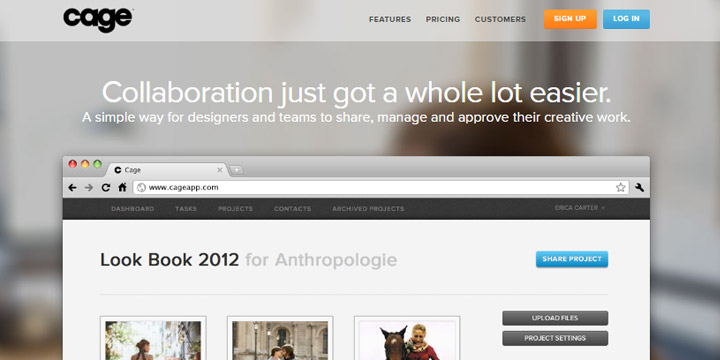
Designed for smaller businesses, Cage allows freelancers and small teams the ability to share projects with clients and other collaborators.

Like the other tools, Cage will allow users to leave visual comments on the design.  Cage also has a powerful project management tool that will enable you to assign and manage tasks with both clients and colleagues.

Viewflux

Viewflux

Another tool designed for small businesses and freelancers, Viewflux allows you to see all of your projects in one place.

Viewflux provides visual feedback from colleagues and clients as well as version control so that all stakeholders are on the same page throughout the design and prototyping process.

Zeplin

Zeplin

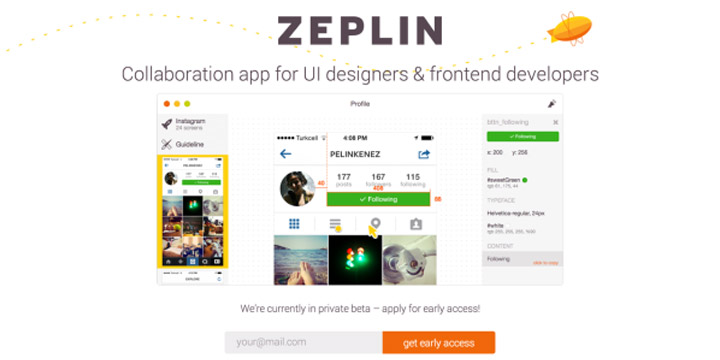
One of the chief goals of Zeplin is to eliminate the friction between designers and developers.  The tool automatically creates style guides and other “resources”.

Through its Slack integration, you can notify the team easily when there is a design change.

Zeplin is priced for small businesses and freelancers and leverages a freemium business model.

Prevue

Prevue

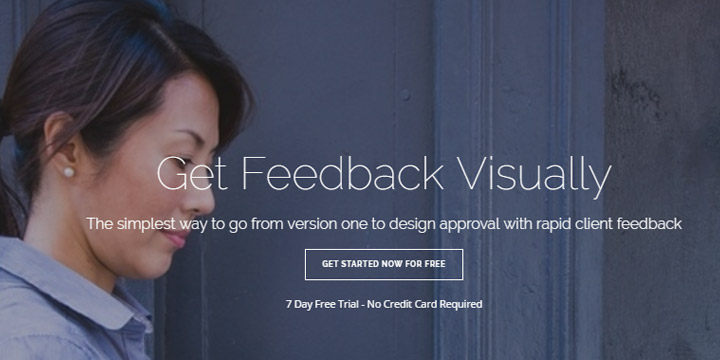
When you’re a designer, you eventually have to present your designs to your clients.  Prevue allows you to create beautiful presentations and receive feedback from the client in real time.

Prevue is priced to be affordable for small businesses.  Plans start for as low as $5 per month and go up to $25 per month for agencies.

Red Pen

Redpen

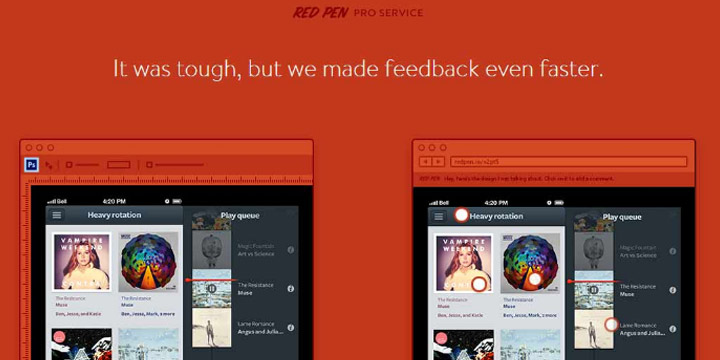
Red Pen is a fast feedback tool for visual teams.  As a designer, you can get feedback from your colleagues as well as point and click to explain your thinking.

You can give access to your clients via a private link so that they too can give feedback.  And each team member on a particular project will be kept up to date on the version, as well as the comments and feedback that was left by both colleagues and clients.

GoVisually

Govisually

Another tool for designers to share their creative work, GoVisually is built for small businesses and freelancers.

Clients and collaborators can make recommendations and give feedback without having to log into the system.  And if you’re wondering, you can have an unlimited number of collaborators.

GoVisually lets you work on multiple projects, design files along with your team members and clients all from one place.

Documentation Tools

Google Docs

Google-Docs

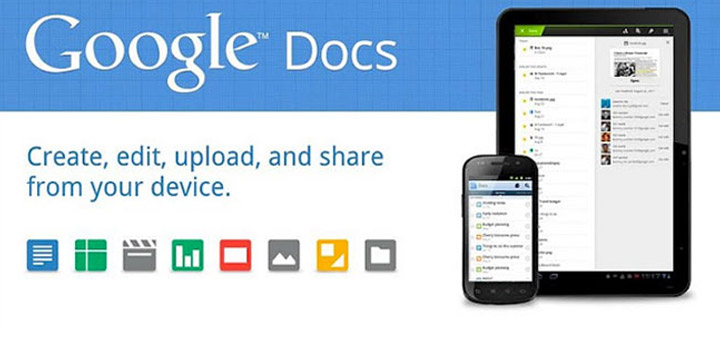
we live in Google Docs.  For a remote company of over 60 employees, we have found that Google Docs is the easiest way to collaborate, share, edit, and eventually publish documents of all kinds.

Google Docs allows us to create blog posts (like this one), spreadsheets, and presentations.  It’s all for free, which is a blessing for startups and small businesses located in various parts of the globe.

Office Online

Microsoft-Office

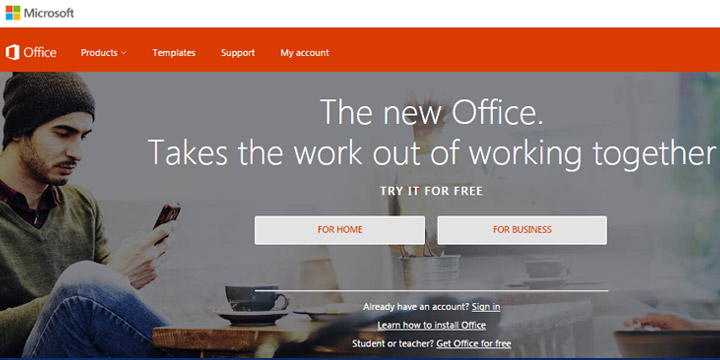
This is Microsoft’s free version of its original Office suite of tools. You get the core of Office: Excel, PowerPoint, Word, and Onenote.  When you combine it with Outlook.com, you essentially get the Office Home and Student suite.

There are certain limitations on the features that you get for free, however.  For instance, if you wish to add a references section such as a table of contents and add citations, you will need to upgrade to the paid version.

There are also some font and formatting limitations as well.  But, if you’re looking for basic documentation and editing tools, the free version will suit your needs just fine.

Etherpad

Etherpad

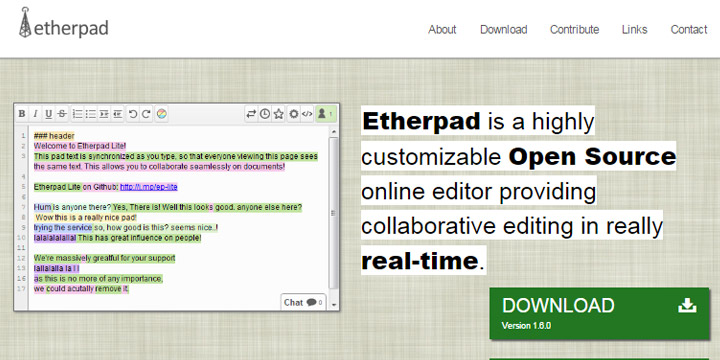
From its website: “Etherpad is a highly customizable Open Source online editor providing collaborative editing in really real-time.”

You can write articles, press releases, and to-do lists, with colleagues and clients all working and editing the same document in real time.  And because it is open source, Etherpad is free to download.

Zoho

Zoho

Zoho Projects provides you with a set of project collaboration tools which helps the team members involved in the project to come together, plan, collaborate and get work done faster.

It helps you create project workspaces that will enable you to collaborate with teams in various geographical locations.  You can give feedback, discuss projects in forums, and share a project calendar to increase productivity among team members.

File Sharing Tools

Google Drive

Google-Drive

When you need safe storage for all of your files, this is the app to use. You will have 15 GB of free storage for photos, documents, and any other digital file you need to store for later use. Files are safe, but easily accessible by you and your team, and you can access them from any device. Organize items quickly and easily, and then share them and collaborate with your team.

Dropbox

Dropbox

Dropbox allows you to sync your work no matter where you are or what device you’re working on. While individuals can use Dropbox for free, the Dropbox most affordable business version allows more space (1 terabyte, or enough to store 250 movies) and more features, such as priority email support and higher sharing limits.

With Dropbox, when documents are edited each person on the team will get the latest and greatest version.

Box

Box

Box.com is an enterprise level file sharing service.  Well, more accurately, these days it can be considered an intranet.

Inside of Box, businesses will get a file sharing service, collaboration services, a content management system and the ability to manage your business from a centralized dashboard.

Hightail

Hightail

Hightail is a file sharing platform that allows for creative collaboration among teams.  Hightail is designed to help you manage a project from start to finish.

You can bring clients in on projects, track changes, and ultimately speed up the pace at which your team completes projects.  You can also implement admin level security measures to ensure the privacy of specific projects.

MediaFire

Mediafire

While many of the other file sharing sites on the list have evolved to more complicated platforms, MediaFire markets itself as a simple file sharing and storage platform.  Media Fire focuses solely on bringing its users the best file sharing service possible.

This is perfect for the users who don’t want to pay for extra features.

OneDrive

Onedrive

OneDrive is brought to you by Microsoft as part of its Live brand.  With OneDrive, you get 5 GB for free and if you need extra space, you can get another 50 GB for just $1.99 per month.

OneDrive is pre-installed on Windows 10, and it works on all devices. Access and share files and photos on PC, Mac, Android, and iOS.

OneDrive allows you and your colleagues to collaborate with Word, Excel, PowerPoint, and OneNote from your desktop, mobile device, and the web.

SugarSync

Sugarsync

Unlike services like Dropbox, SugarSync allows you to backup both your files and your existing folder structure.

This ensures that no matter which device you’re accessing your files, you will always know exactly where they are.  There is no need to “remember” where a document lives on your laptop and in your SugarSync environment.

Project Management Tools

Asana

Asana

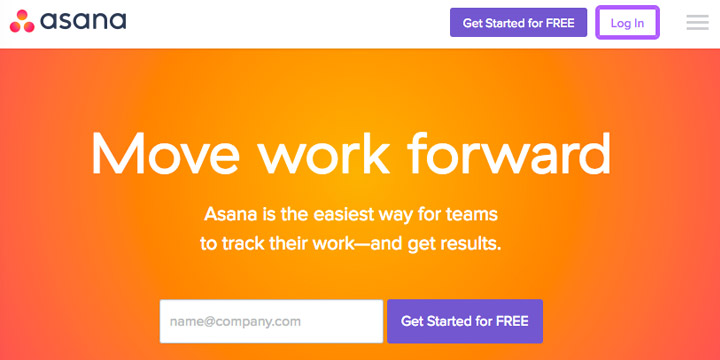
Asana is a cloud platform that enables all of your employees to log in no matter where they are, as long as they have a wifi connection. The dashboard consists of three panels in order to give you all of the data you need on a given project.

As a business owner, Asana will give you an overview to all projects currently going on in your organization. This is the information on the left hand side of the dashboard. Once you click on a particular project, the middle of the dashboard will allow you to zoom in on the tasks associated with the project. And finally, the right hand side of the dashboard will be even more granular. There you can see who is assigned to a particular task and when it is due.

Podio

Podio

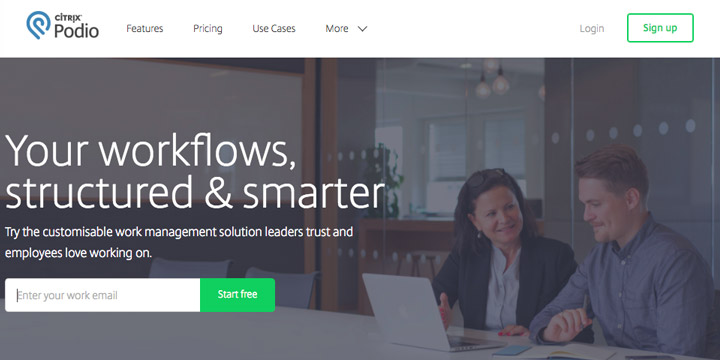
Podio is a powerful tool that helps entrepreneurs and managers operate their businesses effectively.

As a remote team of over 50 employees operating in over a dozen countries in all conceivable time zones, tools like Podio make it possible for for us to get everyone moving in the same direction.

All managers need to know what tasks employees are working on, how employees are spending their work day, and can be assured that employees are able to easily collaborate amongst themselves, no matter where they are located.

Trello

Trello

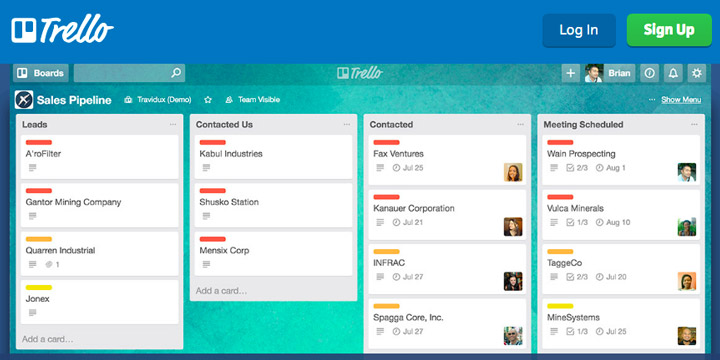
Trello is a web-based tool that allows you to organize your projects using cards that are organized on a board. To conceptualize this, imagine writing tasks on Post It Notes and sticking them in columns on a wall. You can write on them, take them off of the wall, and move them around.

Each column represents a different part of the project. As you and your team make progress on a card, you move it across the board. This lets you see the status of everything you’re working on with just a quick glimpse at the board.

Basecamp

Basecamp

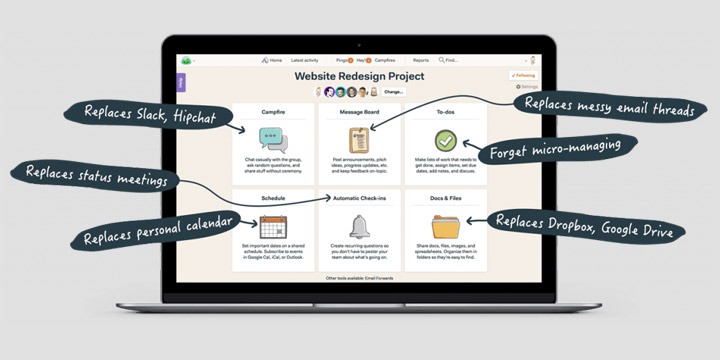
Even though the guys running Basecamp didn’t invent the project management software category, they are probably one of the most loved software companies in the world.

With their simple, easy to use, powerful and very affordable software, it is perfect for small businesses. Its free offer and minimal learning curve mean you can get started without much of a hassle.

ProofHub

ProofHub

According to its website, with ProofHub you get plenty of options to plan everything in your projects and stay more productive at work. From adding people to assigning different roles to them and defining who’s who of the project, you can do it all with ProofHub.

You get a 30,000 foot view on important events with the help of native calendar. And, the option to set dependencies on tasks makes it even easier to plan your project activities.

Wrike

Wrike

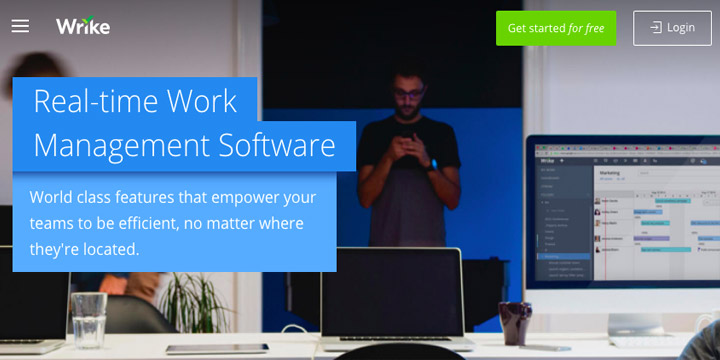
Wrike allows you to break large tasks into smaller goals and manageable pieces.  You can easily track each team member’s progress and individual contribution to the team.

Wrike’s reports provide easy to read data on how much time and money is being spent on a particular project so that you can ensure you come in under budget.  This feature is extremely beneficial to agencies and other client service based businesses.

LiquidPlanner

LiquidPlanner

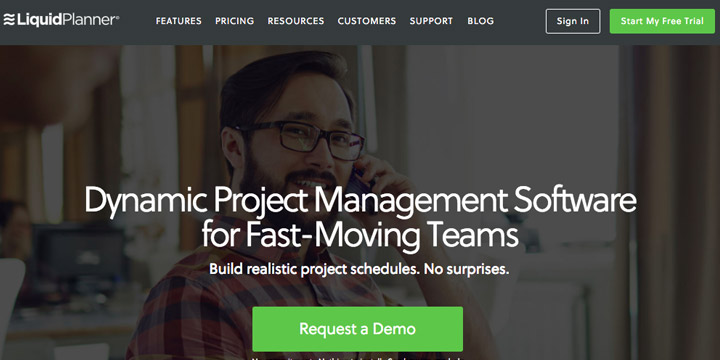
The project management tool designed to serve technology teams.  According to its website “Technology teams are continually being asked to do more work with either the same or fewer resources.”

LiquidPlanner is flexible enough to allow developers to use either Agile or Waterfall methodologies in order to accommodate the needs of all users to their platform.

Users can organize projects, collaborate seamlessly, and even track time to see how long projects take to complete.

WorkflowMax

WorkflowMax

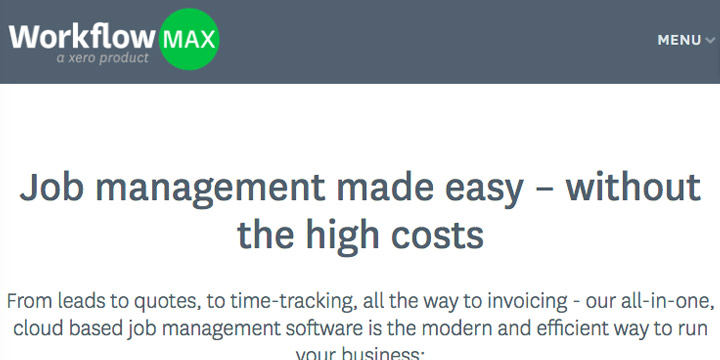
WorkflowMax is the project management tool for mid-sized client service firms.  Think of WorkflowMax as a hub for various services such as accounting, billing, project management, lead management, creating quotes, and a whole host of other services required to run a client service business.

With WorkflowMax, you generate beautiful and robust reports that will allow you to make sure your projects, from start to finish, are delivered on time and under budget so that you can ensure each one of your clients is profitable for your business.

Mavenlink

Mavenlink

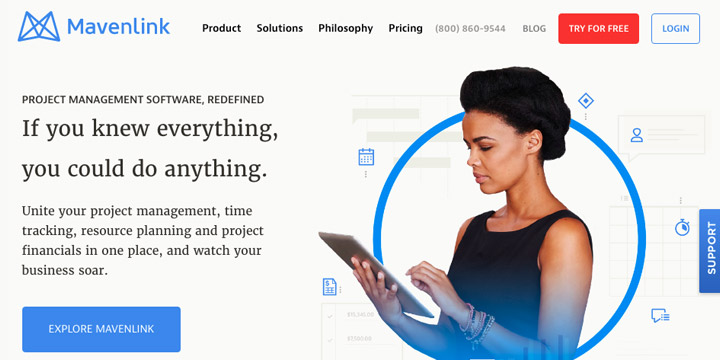
According to its website, Mavenlink exists “To serve professional service organizations with a more efficient, elegant, and profitable solution to manage their project-based business.”

Like WorkflowMax, Mavenlink is a hub for the various processes that go into a client service business.

Mavenlink realizes that projects in the “real world” are dynamic and ever changing.  There is no linear progression.  Mavenlink’s platform is flexible enough to accommodate the dynamics of projects that come from demanding clients.

Nimble

nimble

Nimble combines your address book and social media contacts into a sales and marketing CRM solution. All contacts are linked with conversations you have had with prospects and customers, and their records are automatically filled with social information under one record. Nimble also has targeted marketing features such as group messaging for one-on-one authentic outreach and offers insights into who has opened or clicked in your message. Nimble browser extension allows you to work with Nimble alongside your webmail, on social media, or in any website.

Zoho Projects

Zoho-Projects

With over a million users, Zoho Projects is designed to help team members plan, track and collaborate with each other, no matter where in the world they are located.

Zoho allows you to plan projects, track bugs, keep track of time, and manage documents all from a single platform.

SwiftKanban

swiftkanban-01

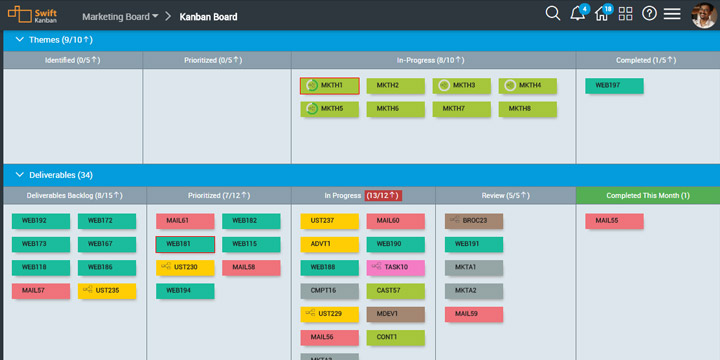
SwiftKanban is a web-based visual tool for project management based on Kanban best suited for software development teams, IT Operations and DevOps teams, project managers or business functions. It offers easy visualization to manage team’s processes and works well for both co-located and distributed teams.

SwiftKanban offers support for Scrum, Iterative and other software development methods and also integrates well with existing Agile tools. With a highly visual Kanban board, projects teams can access a wide range of Kanban metrics and manage the flow of work and identify bottlenecks through visual cues.

Software Tools

GitHub

Github

At the time of this article, GitHub is the most popular software repository on the web.  According to a March 2015 Wired article, GitHub is one of the top 100 most popular websites in the world and hosted 9 million software projects.

GitHub wraps a version control system called a Git where developers can host their projects for free as well as exchange and talk “code” with other developers.

Bitbucket

Bitbucket

Bitbucket is another large software repository platform and is brought to you by Atlassian, the same folks who own the JIRA and Hipchat brands.  Unlike Github, Bitbucket offers unlimited private repositories.

Where Github focuses on Opensource, Bitbucket is designed to help developers within enterprises to collaborate on projects.

CodePen

codepen

Codepen is billed as “A playground for the front end web.”

You can show off your latest creation and get feedback, build a test case for that pesky bug and find example design patterns and inspiration for your projects.

While you can start for free, CodePen will allow you to upgrade to pro features for $9 per month.

Usersnap

Usersnap

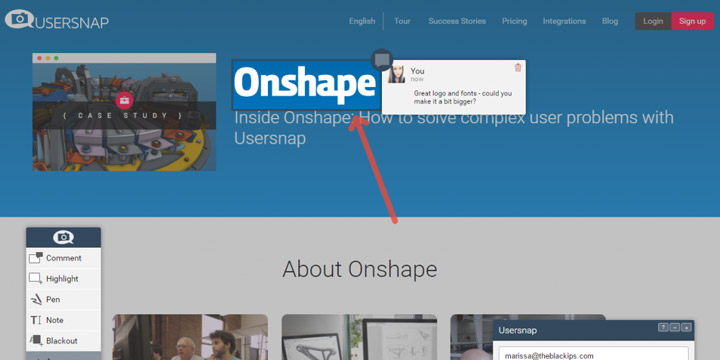
Usersnap is a simple, yet powerful bug tracking & user testing tool. With annotated screenshots, it makes it super-easy to communicate change requests, bug reports or user feedback with your developers and designers.

With point-and-click annotation tools, Usersnap helps you report bugs where they happen: in your browser. No need to switch to a bug reporting application or to fill out endless forms. Bug tracking is now a picnic!

Gitlab

Gitlab

Gitlab is a web based git repository service (like Github and Bitbucket) that is written in the Ruby programming language.

According to Upwork “its permissions, branch protection, and authentication features are what really make it stand out. Teams can secure projects on a more granular level, and projects are kept even safer while they’re being worked on.”

Fogbugz

FogBugz

Fogbugz allows developers to prioritize issues so that they can keep projects organized.

Fogbugz also makes it easy for customers to communicate with developers on feature requests and bugs so they have all the context they need to solve the pressing need of the customer without switching between multiple products.

And last but not least, Fogbugz takes a holistic approach to building (and selling software).  You can collaborate with designers, marketers, and support staff to complete projects, not just other developers.


PSD to HTML5 Conversion – Best Solution to Advance Your Website Performance

If you have a business website, then your main goal would be to attract as many potential customers, in order to achieve your business goals. Therefore, it is of the utmost importance to have your website upgraded to the latest W3C standards for web design and development.

Features of HTML5 websites:

HTML5 is one of the most advanced web standards, which has revolutionized and simplified the process of creating effective websites. Unlike in the PSD based websites, you won’t need to have the whole web pages made of various images, because they will simply slow down the page loading, and annoy your visitors.

On the other hand, HTML5 uses CSS3 codes which eliminate the use of images in unwanted parts of the pages. That helps in making your web pages load faster, thereby creating an enjoyable experience for your web visitors.

Of course, you can use images in places where you need them, but it still does not mean that you will need to create whole pages in PSD image formats.

You could also use videos with the help of ’<video> </video>’ tags, which means that you will not need to specially develop flash based videos. Similarly, there are many other tags which have been included in HTML5 to create robust web pages. Also, some of the old and redundant tags have been removed.

Now let us look at some of the reasons why conversion of PSD to HTML5 can help you in improving the performance of your business websites.

Compatibility across all different browsers and screen sizes:

Most websites are being converted from PSD to html5, because these websites are responsive, and can adjust to the varying screen sizes of tablet PCs and smartphones. In addition to making your website responsive, the web pages which are developed with HTML5 offer seamless compatibility across all different types of browsers.

If your business website has to be effective and attract more customers, then it is of prime importance to ensure that it runs smoothly on any browsers, which your customers will be using, be it on their computers or on their smartphones.

Choose right Content Management System:

You can gather a lot of useful data about your customers, and about their shopping patterns, by collecting data from your websites. It means that your website has to be integrated with an effective CMS system. It helps you in managing you database more effectively.

Such data can be very invaluable, especially when you are analyzing your business performance, and planning newer strategies. If your website is still working on the old PSD format, then it becomes imperative for you to get it converted from PSD to HTML5.

In addition to the above mentioned reasons, there are various other technical reasons which clearly a put the websites with HTML5 on the driver’s seat.

You could contact any dependable service provider who specializes in PSD to HTML5 conversions to help you in improving the experience of your visitors on your business website. Make your move today, and enjoy the benefits of increased customers. Only PSD 2 HTML Offer PSD To HTML Conversion Service in $59 USD


PSD To Responsive HTML

A responsive website is the demand of every business, these days, that wishes to engage with customers. Bootstrap is an effective solution for getting rid of the tangle of designing a responsive website. It is a combination of HTML, JavaScript, and CSS developed by Twitter. This open source framework can let you create user interface components and add some advanced featured to your site. It uses a dynamic style sheet language called LESS. With an impressive website, it can get easy to impress the visitors too.

There are few css framework that help you to create responsive websites.

  • – Twitter bootstrap
  • – Responsive 960 grid system
  • – Gumby Framework
  • – Foundation

These are best CSS framework that help to create responsive web pages.

For many developers, converting PSD To Bootstrap HTML websites that are highly responsive and cross platform compatible is not an easy task. A maculate written CSS code is required but with bootstrap that requirement can end. It can let you create a CSS code that can provide the exact level of responsiveness to your website. PSD to HTML is a common phrase used for explaining the process of taking the design of a website in any common format preferred by the web designer and converting into a code so that it may be functional on other web browsers. This is all what PSD To Bootstrap HTML conversion do.

Reasons to choose Bootstrap

  • Bootstrap lets you create responsive layouts in a better and easier way than any other tool
  • Provides cross browser compatibility
  • Makes the code pattern easy to reproduce and understand
  • No complicated setup required for upgrading the framework
  • Provides an elaborately documented CSS code

Bootstrap can let you build a responsive website. It is much more than a collection of tools and templates. It can let you develop any type of website whether it supports Content Management System, customer CSS, Joomla, Word Press, Drupal, etc. or not. The best part is that this framework is supported by all major web browsers.

PDS to HTML conversion with Bootstrap
Bootstrap has all major HTML components within that can be used in any website. These components include navigational tabs, dropdowns, tool tips, button groups, typehead, accordion, progress bars, and more. The language written in bootstrap is JavaScript so it is easier to understand this language.This is one of the benefits of Bootstrap. Neat functions from the language can be used for making better designs.

Creating responsive website is not easy. Responsive HTML experts are readily offering PSD To Bootstrap HTML services to develop the most flexible and responsive framework for the website. For those, who wish to convert PSD To Bootstrap HTML, might need professional assistance and Responsive HTML experts can provide everyone that assistance.

10 Benefits of PSD To Responsive HTML Conversion

PSD To Responsive HTML Conversion  is the approach to building a website so that it responds to the end user’s viewing environment, platform, screen-size and viewing orientation. The practice consists of a mix of flexible grids and layouts, images and an intelligent use of CSS media queries.

Now a day’s users view websites on a multitude of devices including PCs, Tablets, Laptops, Smart Phones and even their TV therefore a Responsive Website should now be the default mode.

Over the last few years, Bootstrap has become an increasingly popular front-end development framework. More and more developers and designers continue to get on board. Evidently, there’s a reason for that.Most of developer is using bootstrap for Convert PSD To HTML.

1. Increasing Tablet and Mobile Audience

With 40%+ traffic on a majority of our customers’ websites now coming from mobile devices you would be excluding a large proportion of your potential new customers from having an enjoyable browsing experience with your website.

Traditionally users have been redirected to separate mobile websites however the latest web technologies allow us to serve different resolution-specific content without having to reload the web page or redirect the user.

2. Return on Investment

Well, actually with Hostpipe’s packages, there is no additional investment for making your website responsive.

Our core philosophy surrounds ensuring that we adhere to Web Standards Compliance, and with the addition of a simple plug-in (BootStrap) and a few tweaks to the code it can be as simple as producing a different stylesheet for print.

3. Increase Sales and Conversions

Your website is a sales tool and in many cases will provide the first impression of your company to potential new clients, therefore a well polished, responsive website will ensure that you give the best first impression.

Not only that but when the client visits your full website they will see a consistent brand and image, with the resulting positive impact leaving a trustworthy imprint.

4. Search Engine Friendliness

There’s no doubting that Search Engines now grade websites on how responsive they are, and so with well organised content being served to the search engines through a well equipped responsive framework you are more than likely to get a few bonus points from the Search Engine’s complicated algorithms.

Not only that but Search Engines are more likely to display mobile content when you are on the move and viewing searching for stuff via 3G, so if it receives a search query from a mobile device it is more likely to give preference to mobile enabled websites in its search results.

5. Save time Managing Site Content

A truly responsive website means that you can create one set of content within your content management system (CMS) and then leave it down to the template your website developer has created to determine how that is handled. No more writing two sets of content for mobile and web.

At the end of the day why should you have to change your marketing and business logic just because the website framework doesn’t allow it? One product = one page of content. Shimples!

6. Stay Ahead of the Competition

Many websites are still not paying attention to the changing requirements and the need for responsive design. Therefore if your website is responsive, the likelihood is you will be one step ahead of your competition.

7. It will Future Proof your Website

Basically a truly responsive website will adapt the content to fit on any screen size and resolution, therefore your website is likely to work on the next new-fangled, crazy device which Apple or Google throw at us.

8. Keep your Analytics in one place

Simple really, a single URL means a single set of analytics to look at and decipher making it easier to examine the goals you’ve set and the funnels your site visitors have travelled through to reach those goals.

9. Additional Features of Mobile Devices

Mobile devices make great use of their in-built technology such as cameras, compass, geolocation GPS and accelerometer. The benefits of responsive website design in relation to this is that your company can use these features to enhance the mobile user’s experience.

10. Daft not to Take Advantage of any of the above

OK, so I couldn’t actually come up with a tenth benefit because all of the above benefits collectively will have such an impact on your website it simply seems daft for you not to make your website Responsive.

Only PSD 2 HTML Offer PSD To Bootstrap Conversion in $99 USD & PSD To HTML5 Conversion in $79 USD.